Dalvada Recipe
Introduction
Dalvada, a popular snack in many Indian households, especially during the rainy season, is
known for its crispy texture and flavorful taste. Often, homemade dalvada doesn't achieve
the same level of crispiness as the ones bought from the market. However, with the right
techniques and a few tricks, you can make dalvada that is equally crispy and delicious. This
recipe uses moong dal as the main ingredient and incorporates a step-by-step method to
ensure perfect results every time.
Hello friends, I am Hetal. Welcome to Kitchen Kraft! Today, we will make delicious, crispy
dalvada at home. Subscribe to the channel and press the bell icon to watch new recipes first.
Let's get started!
Instructions
Soaking the Dal:
1. Soaking the Moong Dal:
- Measure 1.5 cups of moong dal using a 250 ml cup.
- Soak the dal in water for 4-5 hours. If you are short on time, soak it in warm water for 1-2
hours.
- Tip: Ensure the dal is fully submerged in water and stir occasionally to ensure even
soaking.
2. Draining the Water:
- After soaking, drain all the water from the dal thoroughly. Excess water can affect the
consistency of the mixture.
- Precaution: Use a fine-mesh strainer to ensure no water is left, which can make the
mixture too watery.
Preparing the Mixture:
1. Grinding the Ingredients:
- In a mixer jar, add 5-6 green hot chilies, a few pieces of ginger, and 1/2 cup of green
garlic (or regular garlic).
- Add the soaked moong dal to the mixer.
- Grind the ingredients by pulsing the mixer—start for a second, then turn off, and repeat
until you get a paste with some coarse particles.
- Tip: Avoid adding water while grinding to maintain the correct texture of the paste.
2. Stirring the Mixture:
- Transfer the paste to a different utensil.
- Stir the paste for 5-7 minutes to incorporate air, which helps in making the vada crispier.
- Precaution: Use a spoon or your hands to stir the mixture thoroughly.
3. Adding Spices and Ingredients:
- Add 1.25 teaspoons of salt, 1 teaspoon of asafoetida, and 2 tablespoons of besan to the
mixture. This will help in binding the vada.
- Add 1 cup of finely chopped spinach or coriander leaves. Mix well.
- Tip: Ensure the mixture is light and fluffy. If it feels dry, sprinkle a little water and mix
again.
4. Adding Baking Soda:
- Add 1/2 teaspoon of baking soda to the mixture.
- To activate the baking soda, squeeze some lemon juice over it.
- Precaution: Use baking soda sparingly. Excessive use can alter the taste and texture of
the vada.
Shaping and Frying the Dalvada:
1. Heating the Oil:
- Heat oil in a deep frying pan or kadai.
- Once the oil is hot, reduce the flame to medium-high.
- Tip: Test the oil by dropping a small piece of the mixture. If it rises to the surface
immediately, the oil is ready.
2. Shaping the Vada:
- Take a small portion of the mixture with your four fingers and press with your thumb to
shape it into a vada.
- Gently slide each vada into the hot oil.
- Precaution: Do not add water to the mixture at this stage, as it can make the vada lose
its shape.
3. Frying the Vada:
- Fry the vada in batches, making sure not to overcrowd the pan.
- Fry for about 4-5 minutes until golden brown and crispy.
- Tip: Stir occasionally to ensure even cooking and prevent the vada from sticking
together.
Double Frying for Extra Crispiness:
1. Pressing and Second Fry:
- Once the vada are fried, place them on a plate and press each one with a bowl to flatten
and give them a circular shape.
- Heat the oil on high flame and fry the vada again for 2-3 minutes to achieve extra
crispiness.
- Tip: Double frying ensures the vada remain crispy for a longer time, even after cooling.
2. Alternative Method:
- For a healthier option, you can make the vada crispy using a non-stick pan with less oil.
- Precaution: Note that this method may slightly alter the taste compared to deep frying.
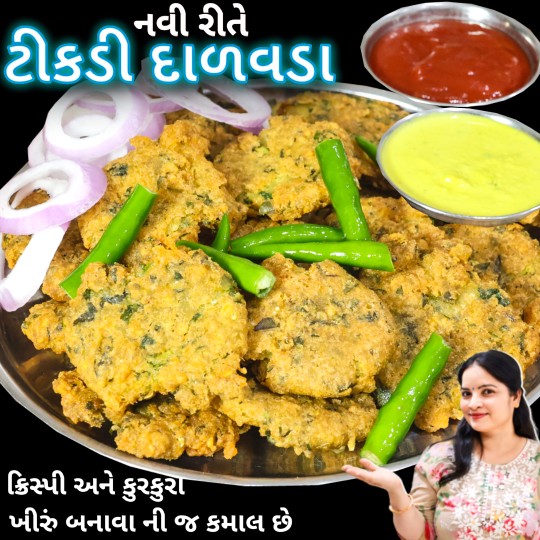
Serving the Dalvada:
1. Final Touches:
- Remove the vada from the oil and place them on paper towels to absorb excess oil.
- Serve hot with green chilies and thinly sliced onions.
- Tip: Garnish with coriander leaves or sprinkle some chaat masala for an added flavor
boost.
2. Storage:
- Dalvada can be stored in an airtight container for up to a day. Reheat using an oven or a
non-stick pan to retain crispiness.
- Precaution: Avoid storing in the refrigerator as it can make the vada soggy.
Conclusion
Your crispy and delicious dalvada is now ready to be enjoyed! This snack is perfect for the
rainy season or any time you crave something crunchy. Follow these tips and tricks to
achieve market-like crispiness and enjoy the flavors of homemade dalvada. Share this
recipe with your friends and family, and don't forget to leave your feedback in the comments.
Happy cooking and see you next time with another exciting recipe!
Ingredients
- Main Ingredients:
- 1.5 cups of moong dal (250 ml cup size)
- Spices and Seasonings:
- 5-6 green hot chilies
- A few pieces of ginger
- 1/2 cup green garlic (or 4-5 pieces of regular garlic if green garlic is unavailable)
- 1.25 teaspoons of salt (or to taste)
- 1 teaspoon of asafoetida (hing)
- 2 tablespoons of besan (gram flour)
- 1 cup finely chopped spinach (palak) or coriander leaves
- Other Ingredients:
- 1/2 teaspoon of baking soda
- Lemon juice (to activate baking soda)
- Oil for deep frying